Friday, December 29, 2017

Stationary Photography

Today, something different. Rather than looking at a single composition topic, I'm going to share with you two pictures of the same subject -- the train station in Ansonia CT.

First, a black and white picture.

Single Track Platform by Mark Becwar on 500px.com

A couple points about this composition. The black and white works here because of the wide variety of different tones across the image. The white of the platform's roof structure stands out against the darker tones of the background. We also get a benefit here from the sun reflecting of the polished rails. That helps them stand out against the ballast (rocks) underneath. Besides the different tones, there are also different textures across the image, which allows the different elements to stand out. My saying when shooting black and white is, "you can never have too much contrast." For reference, here's the unmodified version of this photo:


The second shot we'll look at is the same station, but in color.

Station by Mark Becwar on 500px.com


Here I'm playing around with the repeated pattern of the support beams. The focus point is roughly half way along the platform. The key to this composition is definitely that repeating pattern. The station is on a slight curve, which from this angle means that each post is exposed roughly the same amount from the previous. This photo was also slightly retouched to bring up some of the details. Again, for reference, here is the unmodified version:


In this case you can see that there was very little retouching here.

If you have a picture you'd like to share, and have me talk about the composition, I'd love to hear from you.

Yes, the title of the blog is a pun. I apologize for nothing.

Wednesday, December 27, 2017

Photography Wednesday: Transportation

Because of the holiday this week, I'm going to keep Photography Wednesday brief. First up, a train coming into Ansonia, CT station through the mostly abandoned Farrel foundry.

Oncoming by Mark Becwar on 500px.com

Next, the signal on the other side of the crossing.

Barbed Wire and Rust by Mark Becwar on 500px.com


Both pictures taken a couple weeks ago from the same spot, with a little bit of post-processing.

Hope your holidays are going well.

Monday, December 25, 2017

Merry Christmas!

Merry Christmas! I hope your holiday season is filled with joy, and wish you the best today and throughout the rest of the year.

Christmas Lights by Mark Becwar on 500px.com

Decorations by Mark Becwar on 500px.com

Christmas Tree by Mark Becwar on 500px.com

Town Green by Mark Becwar on 500px.com

Big Tree by Mark Becwar on 500px.com

Holiday Display by Mark Becwar on 500px.com


Friday, December 22, 2017

D Is For Diffraction Spikes

Today we're going to look at something that you've seen before, but may not know the name of: diffraction spikes. Let's start with an example. The lights on the left side of this image have strong diffraction spikes, but if you look closely, all of the light sources in the image have them.

Holyland by Mark Becwar on 500px.com


First a little background. Some of you may remember from physics class that light behaves like a wave. (If you don't, or if you haven't had that class, that's ok.) Because light acts like a wave, it diffracts (bends) when it passes through a hole. In a circular aperture, like a lens that's fully open, the diffraction is equal in every direction. The stop in the camera is approximately circular, but not quite. Those corners are what creates the spikes.

(For a more information about the topic, check out the Wikipedia article on them. Optics is a big topic, and I really can't do it too much justice in the short form blog entries.)

That said, you don't get spikes automatically every time. Why not? To vastly oversimplify, the light needs to be coming straight into the camera, and there need to be a lot of photons. That means that you need a bright source and/or a long exposure.

Wednesday, December 20, 2017

Photography Wednesday: Fresh Snow

Winter has finally descended upon the Northeast. Pour yourself a hot chocolate, grab a blanket, and scroll along, as we go off into the frozen snows.

First, at the train station in Waterbury, CT.

Fresh Snow by Mark Becwar on 500px.com


Next we travel down the Metro-North Waterbury line to Derby, CT, for a shot down the platform towards New Haven.

Down the Platform by Mark Becwar on 500px.com


Finally, over to the Naugatuck River for a peek at the river in the snow.

Winter River by Mark Becwar on 500px.com


If you have a picture you'd like to share for Photography Wednesday, get in touch. I'd love to feature other people's work here, especially if you're just getting started.

Monday, December 18, 2017

Cheap Camera Challenge: Cell Phone

Welcome to the first Cheap Camera Challenge! What the heck is a Cheap Camera Challenge? Well, the idea is that I take a photo with my professional quality equipment, and then try to reproduce it using a cheap camera. Naturally this comes with one asterisk. I know that the picture taken with the cheap camera won't end up looking exactly the same as the source image. I'm ok with that.

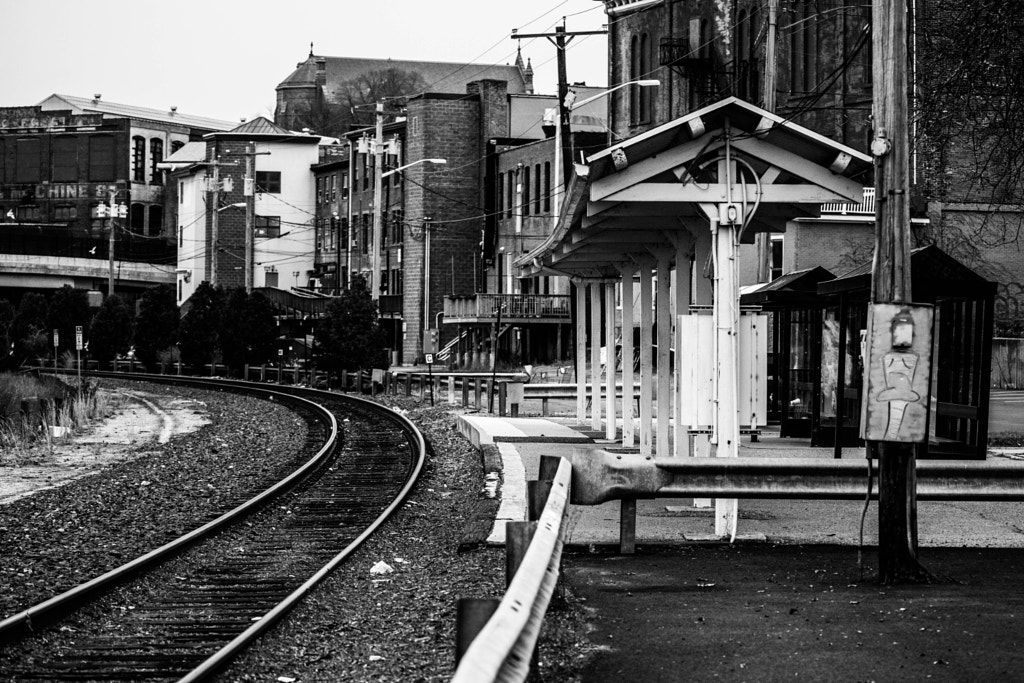
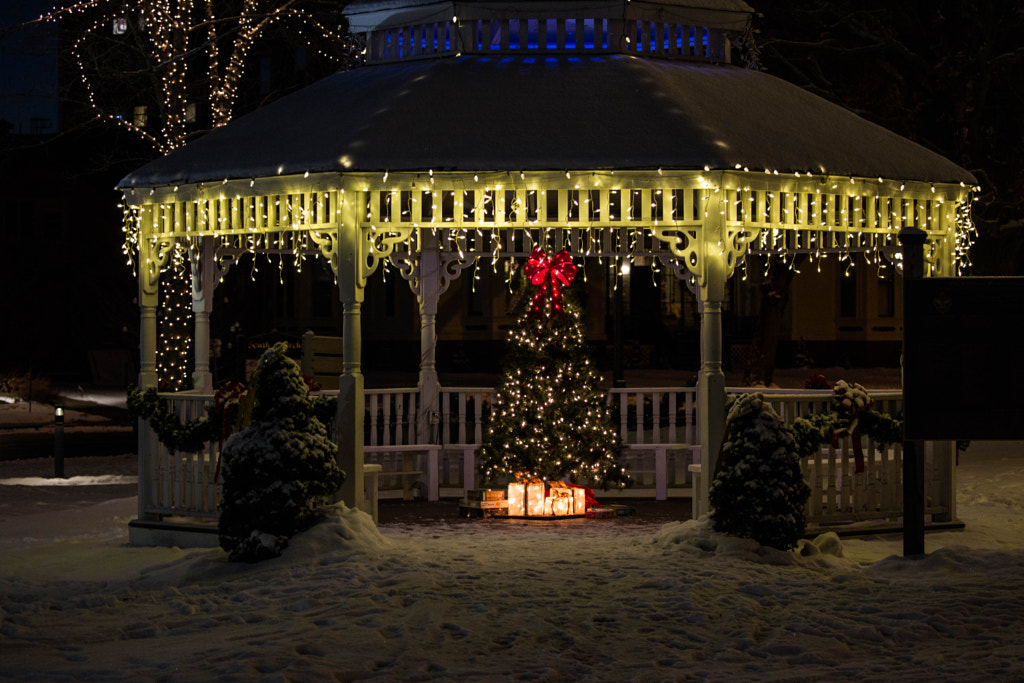
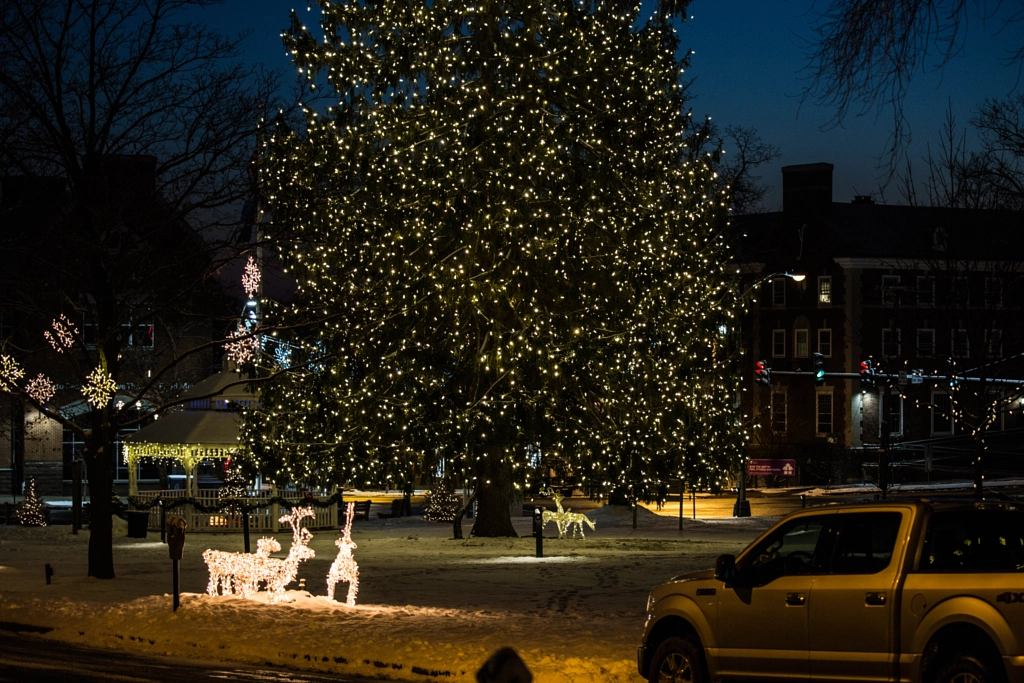
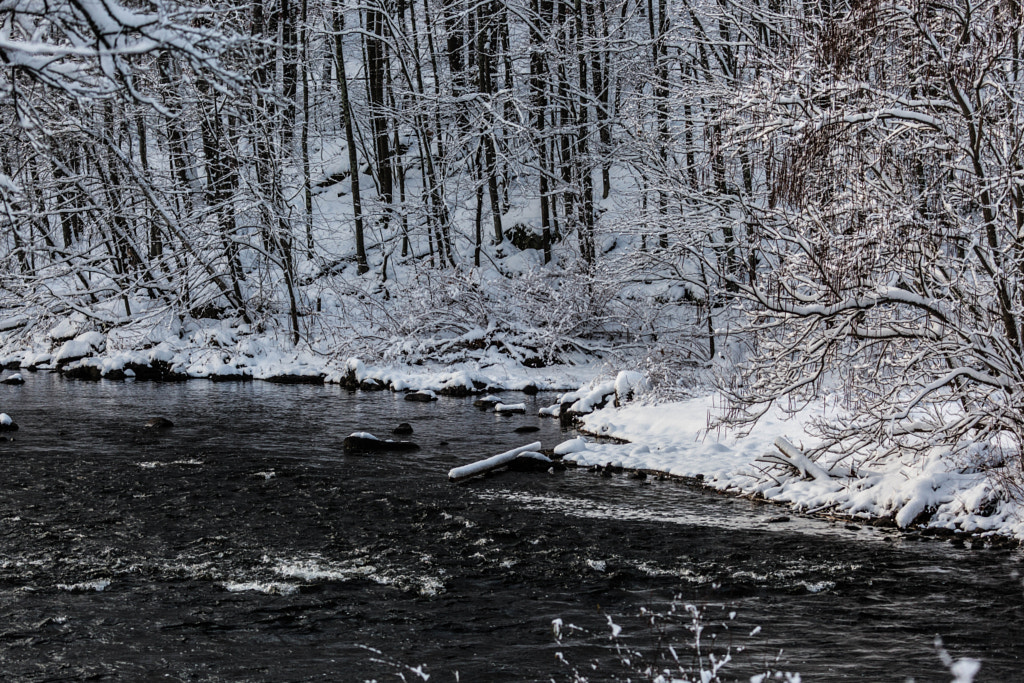
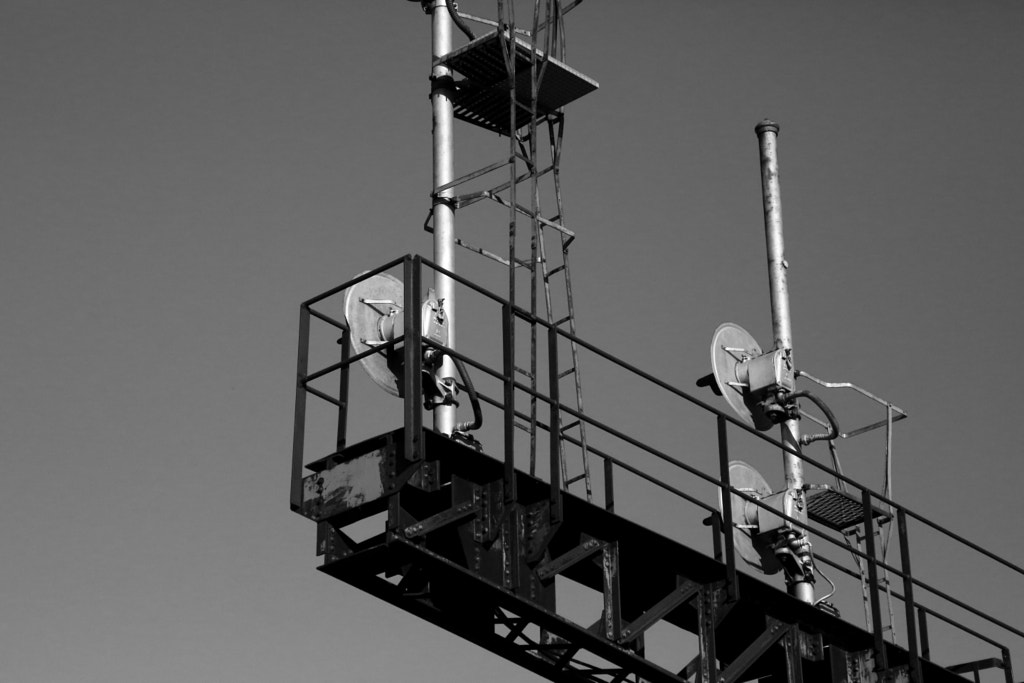
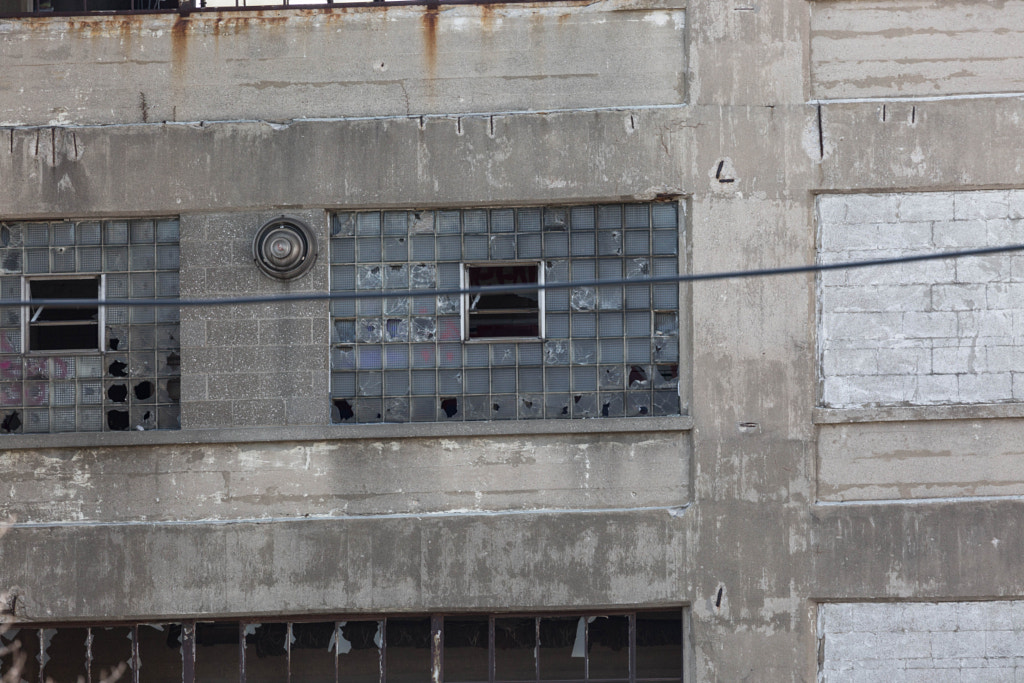
Without further ado, here's the image we're going to use as this week's source image:


This photo is taken with my trusty Canon DSLR. I imported it using Adobe Lightroom Classic CC, and did a little retouching.

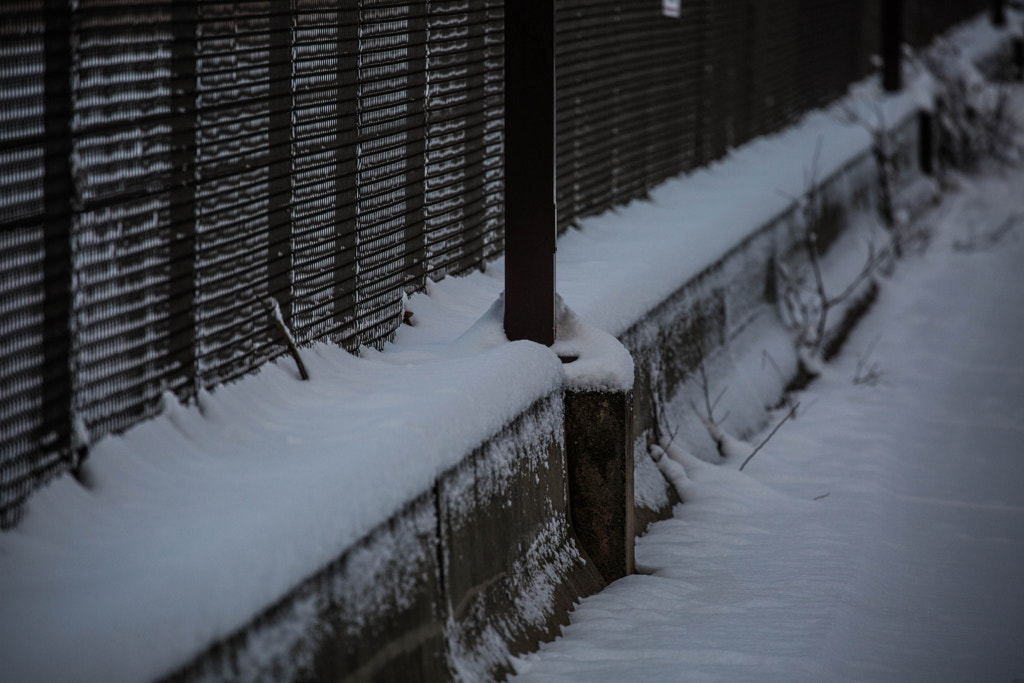
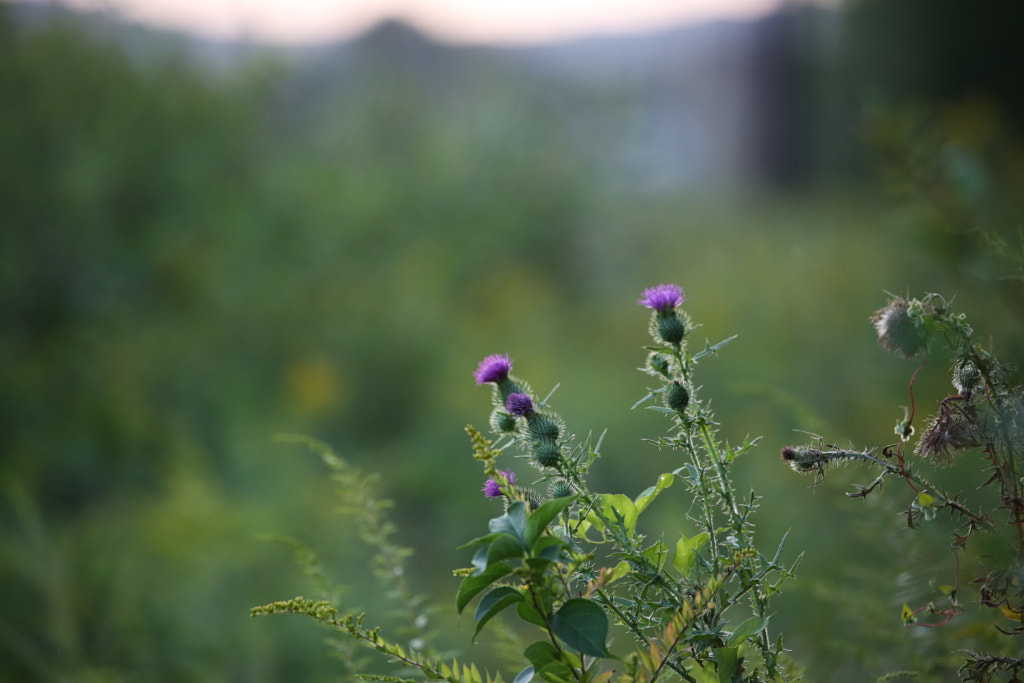
Now, since this is the first one of these, and I'm apparently a glutton for punishment, I've chosen to use my cell phone. This isn't an expensive phone with a high quality camera. This is a cheap phone with an even cheaper camera. And predictably it produces a somewhat disappointing result:


There are a couple of things I could have done to make this easier at the start. First off it's facing east in the morning. (Aka - into the sun) The sun isn't in the frame, but the sky is very bright. In addition to that, the shaded subject and the bright sky tends to throw off the white balance of the photo. The lens is also injection molded plastic, so it doesn't handle off-axis lighting as well as the coated glass lens. Let's see what we can do with this.

BRING OUT THE GIMP!

Since this is a cheap camera challenge, I'm not going to use my expensive tools to process this picture. Today's tool is the GNU Image Manipulation Program (GIMP) which is free, open-source software. It is a good quality editor, and if you need something like Photoshop without the price tag, I recommend it.

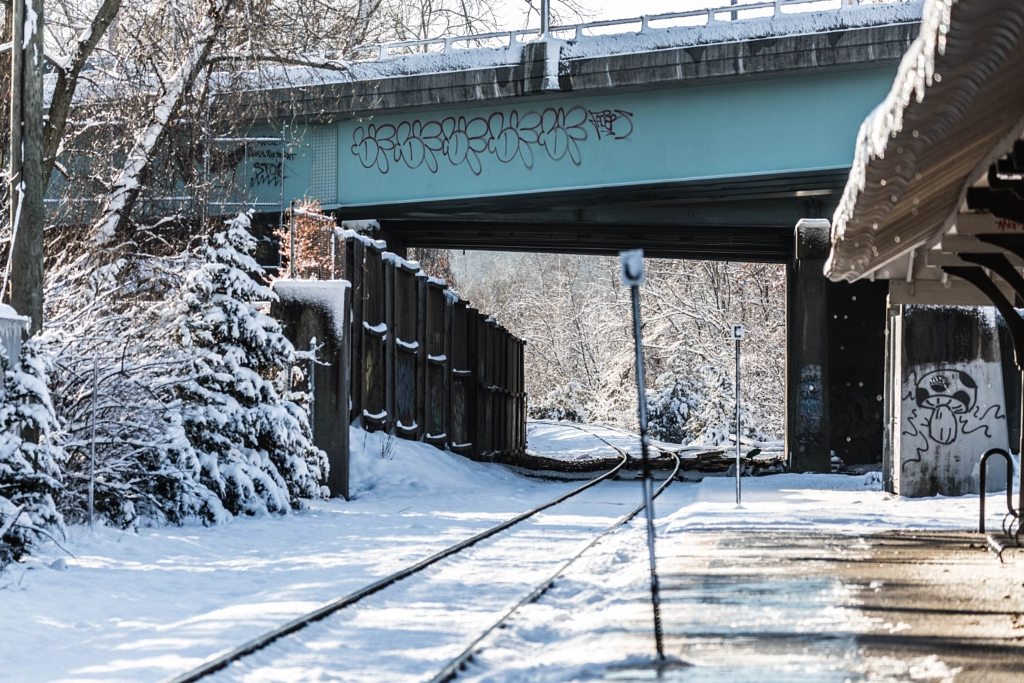
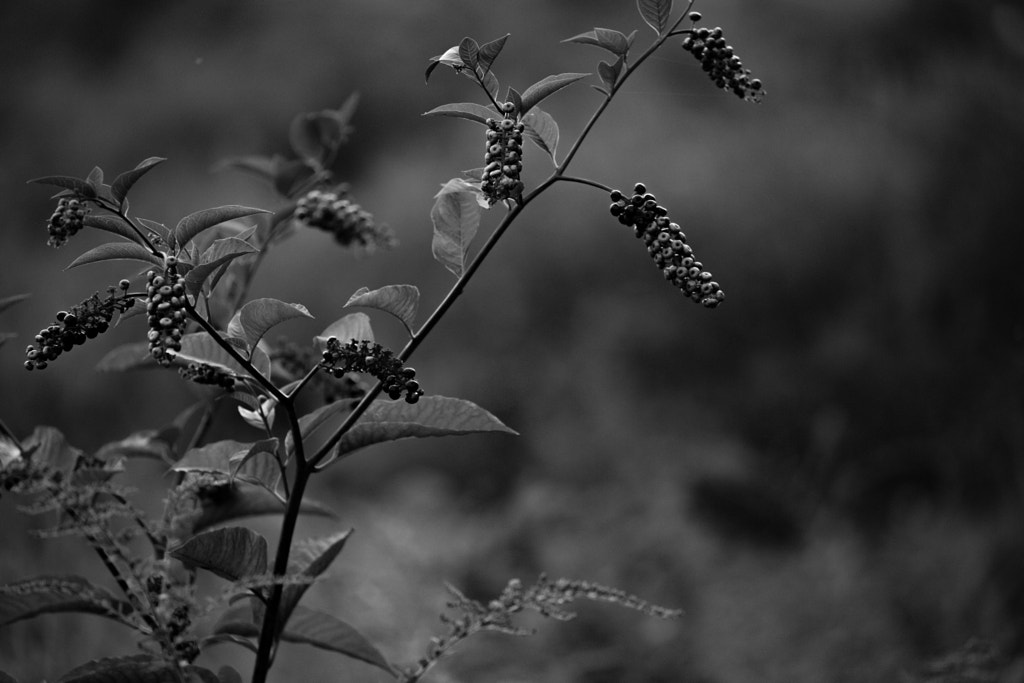
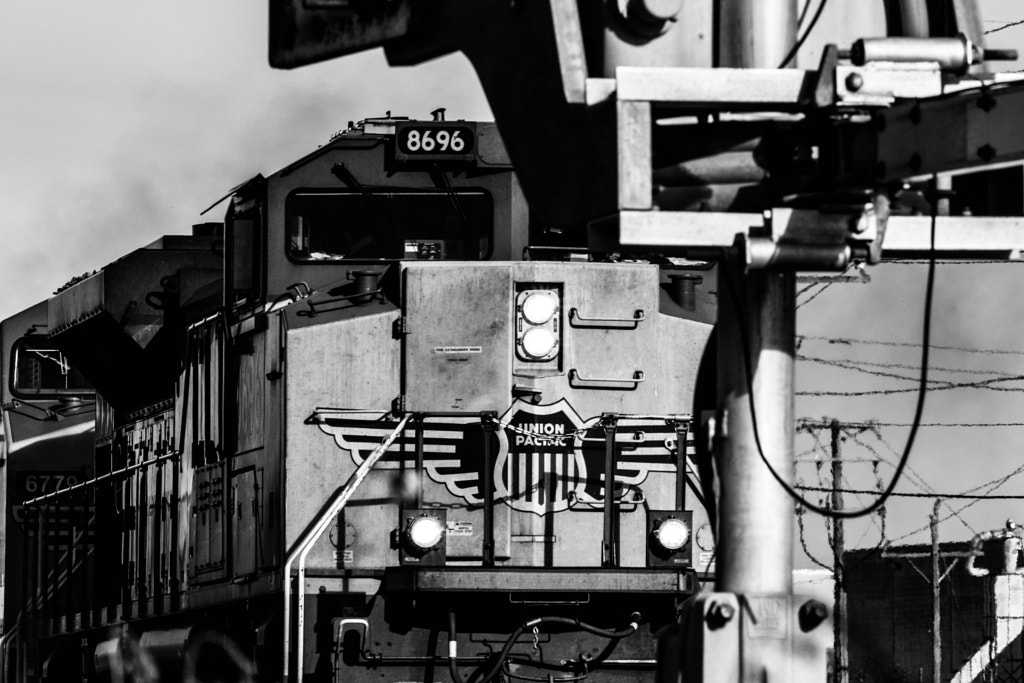
I fired up GIMP and made a couple quick modifications to the picture. First, I adjusted the brightness and contrast. The idea being to reduce the contrast so that the details in the foreground aren't quite as hard to pick out. Second, I de-saturated the color (made black and white). This was partly an artistic choice, and partly because the snow had an odd pink color that I wasn't really feeling. Finally, I ran a tool called the unsharp mask to sharpen the image a bit. Here's the final image after exporting to JPG format:


For comparison, here's the same source image processed using similar tools in Adobe Lightroom:


As you can see, not too much difference. I probably could have come up with the same results using only the free tools. (I'm not really that good with GIMP.)

So why did I do this?

There are, I'm sure, a lot of people out there who've looked at a piece of art that someone made, and been discouraged because they don't have the expensive tools. Hopefully this shows that, no, you don't have to have an expensive set of tools to express yourself. Not having expensive equipment shouldn't prevent you from going out there and trying it. Seriously, if you want to get into photography, go out there with whatever tools you have available to you and do it. You can get a lot of practice with framing and composition without having a fancy camera.

Is it easier to produce a good result with better tools? Of course, but the most important part of improving your photography is developing your eye, and that you can do with anything, even a cheap cell phone camera.

Friday, December 15, 2017

Back To Basics: Shutter Speed

Continuing on from previous entries What the ISO? and Aperture Labs we're going to look today at shutter speed, specifically as it applies to night shooting.
So what is a shutter? Well, Gavin over at the amazing YouTube channel The Slow Mo Guys did a  video showing it better than I could. Seriously, it's amazing. I'll wait for you to watch.

...

Welcome back. So now that you know what a shutter is, and what it looks like, let's do another one of those fancy animations showing a sequence of pictures taken with different shutter speeds. In this case it's a static object. We'll look at the effect of the shutter on moving objects some other time.


As you can see from the series of images above as we expose the sensor for more and more time, we get a brighter image. The more astute reader may also notice that the amount of noise in the image is relatively consistent regardless of the exposure. So what lessons can we take away from these two observations?

First, to shoot an image at night, or when we're in a dimly lit environment, we can increase the amount of time the sensor is exposed to get an image that is bright enough to see.

Second, the added light comes with no (significant) additional noise. For complex reasons this isn't entirely true*, but its close enough for our puropses.

So what's the drawback? Well as Gavin explained, a long exposure will cause additional motion blur. For extremely fast moving objects, you may capture an image that shows two completely different events at the same time. But there's one more problem. The motion doesn't necessarily have to be caused by something in front of the lens. In fact the camera shaking can ruin the picture.

As a general rule, anything slower than 1/60th of a second needs a tripod. This is something that I'd recommend testing out for yourself. If you have particularly steady hands, you may be able to manage exposures as slow as 1/10th or 1/20th. If you have shaky hands, you may need to limit hand shooting to 1/100th of a second.

In later installments, we'll look into the effects of shutter speed with moving subjects. If there's something you'd like to see, or something here that's left you scratching your head, let me know and I'll try to clarify it. In the mean time, have fun and keep shooting.

* We'll talk about diffraction spikes and signal-to-noise ratios in different blog posts.

Wednesday, December 13, 2017

Photography Wednesday: A Festivus Miracle

In honor of the holiday season, I'm going to share some holiday pictures with you. A true Festivus Miracle!

Faerie Light by Mark Becwar on 500px.com

Christmas Lights by Mark Becwar on 500px.com

The first two are an example of bokeh (boh-kay), which is really just a fancy way of saying out of focus. The round shape is actually a projection of the lens aperture onto the detector. Sometime in the future we'll talk about the technical details.
Winter River by Mark Becwar on 500px.com

Finally for today's last Festivus miracle, some freshly fallen snow along the Naugatuck river. To tease some more upcoming content, I'll be talking soon about the problems associated with winter photography, especially in the snow.

Also, if I could ask all of you a favor: A good friend and mensch, the lovable and profane Boozy Barrister was in a car accident yesterday. If you are on the twitter, send some good thoughts to him @BoozyBarrister as he convalesces.

Monday, December 11, 2017

Mediocre Monday: Awkward Animals

There's an old adage in show business that goes, "never work with animals or children." The same could be said for photography. Sure, there are a lot of photographers that make wonderful careers out of taking pictures of wildlife, but animals pose a number of challenges that we have to overcome if we want to take a decent shot. I, for one, have a lot of respect for the National Geographic photogs who schlep a thousand pounds of extremely expensive equipment into a hostile environment, and still manage to capture some candid photos of wild animals doing whatever it is they do.

So today, in honor of International Animal Photography Day, a holiday I made up for this blog post, I present some of my attempts at animal photography. First up, a squirrel.


At least, I think it's a squirrel. I didn't have the camera anywhere near set up for the lighting conditions, so the shutter speed was all wrong, and the camera moved while the shutter was open. Next attempt, a crow.


This one, I spotted a murder (a group of crows) on the side of the road and pulled over. Not wanting to scare the crows, I rolled down the passenger window and attempted to shoot out the open window while leaning across the center console of my truck. It didn't work. The camera wasn't really set up for it.

Well after that I decided that I really wanted to get a shot of a wild animal. Any wild animal. In this case it ended up being a flying rat. (Seagull)


As you can see I used the "snap as many as possible and hope one turns out" technique.  It's surprisingly effective, and something I would have never tried when I shot film. Just so you and I are on the same page here, that set of photos is a sampling of the pictures of that gull. There are more. I only ended up putting one into my portfolio. For reference, here's the final pick, edited:


So that's it. I'm pretty much stuck with that technique. I'm a lumbering oaf, so sneaking up on a critter isn't exactly easy for me. I'm also not made of money, so a $14k super-telephoto is completely out of my price range.

To try to put a bow on this one, I'll say this: Get out there and keep shooting. Take lots of pictures. One of them will be what you are looking for.

Friday, December 8, 2017

Composition Week: Negative Space

For the final day of composition week, we're going to look at the opposite of yesterday's technique. Today it's the use of negative space. Negative space is the area around the subject of your piece. Unlike in graphic design, our negative space isn't necessarily empty. Let's look at a couple examples:


Thistle by Mark Becwar on 500px.com

Wild Berries by Mark Becwar on 500px.com


In these two examples, the negative space is the out of focus area all around the plant that's the subject of the image.The area that's out of focus helps highlight the shape and texture of the plant. We're also helped by the back lighting that serves to create an outline around the thistle, and helps the berries pop out from the background.

In the next example, an empty sky serves as the negative space.


Signal Bridge by Mark Becwar on 500px.com

The blank sky doesn't distract from the small details, and indeed helps them stand out. With a busy background, the thin lines of the hand rails and ladders would be completely lost. This example also shows that there doesn't need to be something in every corner of your frame. In fact, the left-most third of this image is entirely blank, save for the slight gradient from the sky.

One last image to demonstrate negative space. In this case a silhouetted hill at sunrise.

Sunrise Hill by Mark Becwar on 500px.com

The black band at the bottom of the image helps to highlight and counterbalance the sky. It pushes the eye up towards the top of the image, towards the texture of the leaves on the trees, and the colors of the clouds.

When considering composition, remember that the rules are just guidelines. They can help you get started composing images, but, in the end, they are just tools for you to use. When you break one of the rules of composition, try to consider how breaking that rule helps your image. (Whatever media you're working in, be it painting, drawing, or photography)

Well that'll do it for composition week. If you liked it, let me know. I've got about 30 more composition techniques in my topic list, and I'd be happy to do this again*. I do reserve the right to revisit any of these in the future, partially because I'm half senile and can't remember what I did yesterday, but also because there's almost always more you can say about the topic. We'll see you next week for the return of Mediocre Monday.


* I'll gladly do this again, but it's a lot of work, so it will be a little while before I'm up to doing it.

Thursday, December 7, 2017

Composition Week: Fill the Frame

Today, it's a technique near and dear to my heart. We're going to call it "Fill the Frame" for lack of a better name, but basically the idea is to fill the frame with your subject. Let's look at some examples of the technique.

Locomotive by Mark Becwar on 500px.com

NS9237 by Mark Becwar on 500px.com


In these two examples the subject completely fills most of the frame. This helps us in a couple of ways. First, it makes these locomotives look larger than life. They are big and imposing, and filling the frame with them makes that apparent. Second, it allows the details to stand out from the object. We are far enough back that the subject is identifiable, but we're close enough that the small details really start to pop out. Third, because of the way that they're framed, we're seeing the subject in a way that we don't ordinarily get to see. It forces us to think about the scale of the object in a different way.

In our next example we take a slightly different tack, rather than overfilling the frame to make our subject seem larger, we use the filled frame to force our viewer to look at the textures and details.


Concrete and Broken Glass by Mark Becwar on 500px.com

The abandoned cement plant in this image isn't framed in a way to make it imposing, it's framed to show the different textures. By framing this way, we can see the different textures-- from the rust at the top left, to the broken windows at the bottom left, over to the cinder blocks on the right. The relatively uniform background color helps to unify all the different textures. If it was framed to show the entire building, then the texture and color would be lost. (The viewer sees the picture, their says 'abandoned building' and then doesn't see the interesting shapes and textures.)

Tomorrow, for the last day of composition week, we're going to look at the opposite technique to the fill the frame technique. I hope you'll stick around.

Programmer vs Software Engineer: The Interview

A common question presented in interviews for developer positions goes something like this: Given an array of numbers, write a function th...